Materials #1
At the moment we're talking about some rough 'n' ready materials; main purpose is to see if the model houses work.
First things first: I'm using Blender Cycles, and I prefer using procedural instead of image textures.
Of course I won't list all my node setups here; my materials used in this context aren't planned to be too ambitious. Just gonna keep them as simple as possible; they are background stuff. Also surface imperfections won't be a topic here.
It has taken me some time to recognize that it's not only a complex scene with lots of objects, lots of vertices killing my GPU; it's as well lots of complex materials with lots of nodes.
At the moment main things are done by the use of three different kinds of materials: of course brick texture for the walls, something tin-like for most of the roofs, and window glass.
For the tin roofs I "recycled" a material I first used for my Victory stern. It includes some rust and dirt - the exception from the rule, but I think that's okay. We have quite large, uniform faces here, so some imperfections are welcome to get some structure in.
It's free stuff I found on the web somewhere but unfortunately forgot to save the link. Sorry, guys ;-)
Window glass is mainly a (dark) transparent shader mixed with a glossy one. Only thing worth mentioning here: glass looks different dependent on the direction you look at it. If you stand outside and look inward windows almost look black.
Funny enough lots of people do not respect this: I've seen lots of (architectural) renders with apartments lighted like show rooms ;-)
The brick materials may be worth having some words about. I'm using three of them: a red one, another more yellowish, and a very bright one. I use different brick sizes for each color of course.
Watching pics of Paris' inner city one may recognize that most houses were built of some light yellowish bricks (could be sandstone, but I'm not sure). Means that the yellow shaded brick material might be the most important one.
Anyway I didn't like the idea of having lots of houses all shaded the same, so I thought about having some shading variations - of course without creating new materials for each variation.
Therefor I had the idea of using some random value to modify the base color.
Blender's Object Info node offers a random output that can be used here. It produces random values from 0 to 1. To convert them into RGB color you could e.g. use a color ramp:
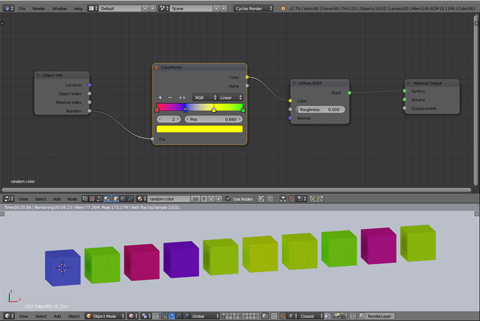

... but for this purpose I prefer to use a HSV node.
It has taken me some time to recognize that opposite to most graphic software the Blender HSV node doesn't define colors but modifies a given color...

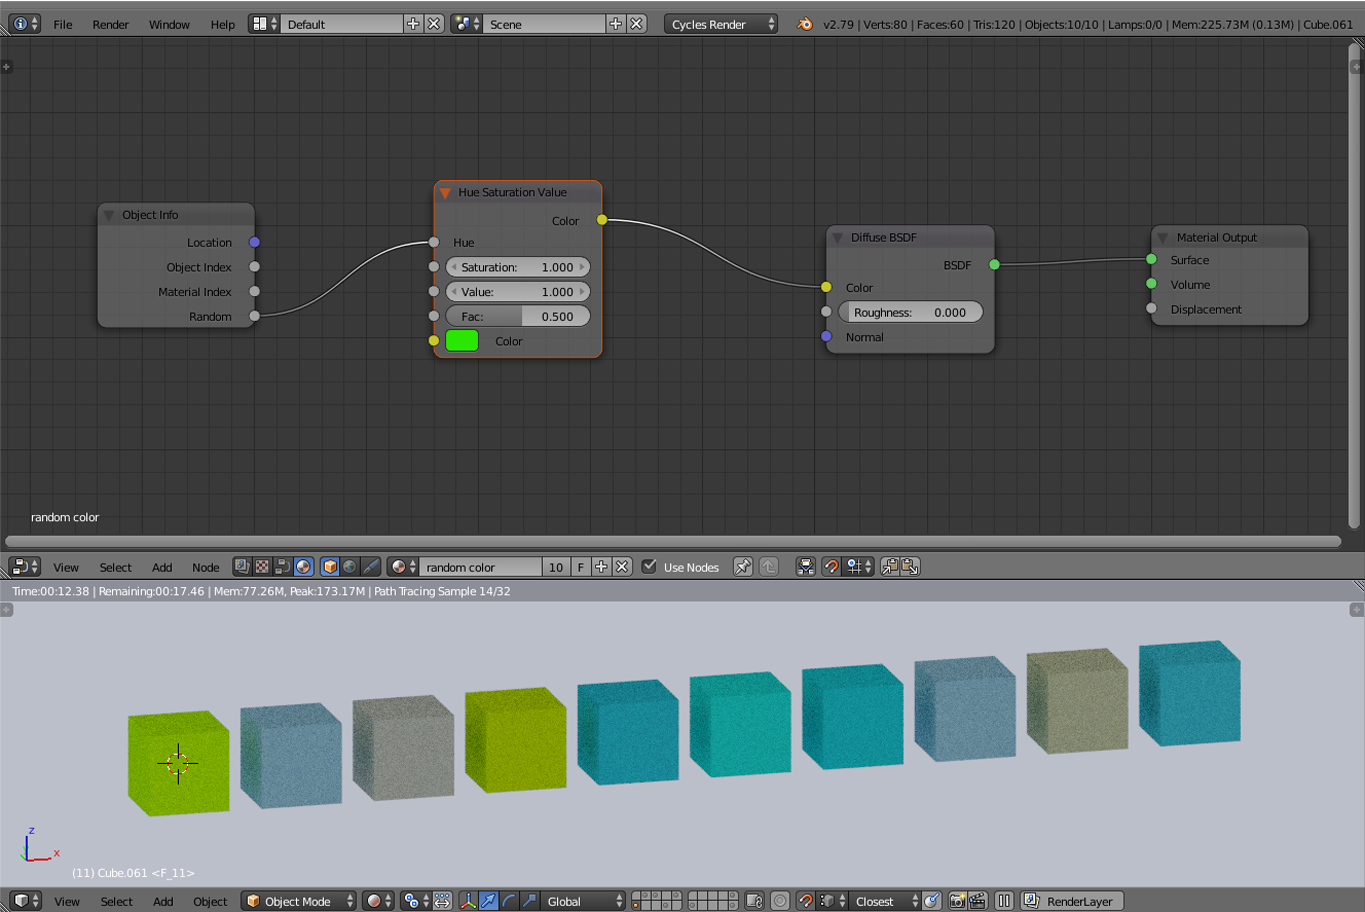
... having Hue = 0.5 to get the pure, defined color.
To get the variations limited to a given range we'll need some simple maths: it's:
lowest value + ((highest value - lowest value) * random value).
For my yellowish brick material I defined HEX D2C6B6 as a base color and thought, a range between Hue = 0.45 and Hue = 0.55 would be fine.
That's the node setup:
Of course the effect is quite subtle, but that's exactly what I wanted.
This is the point where the challenge starts.
Blender's Brick texture offers some variations by itself, producing different shaded stones within the surface:
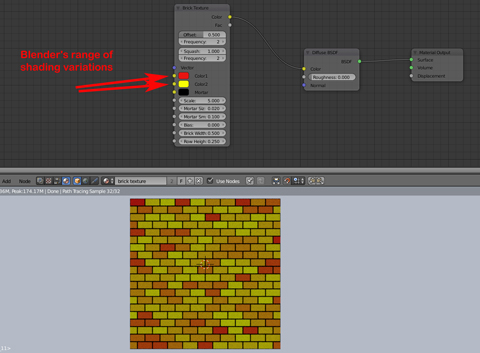

... and I thought about having those influenced by a second random value.
To understand the difficulties it might be useful to have some theoretical thoughts about the problem.
First I guess it's important to know that there is no such thing like "random" in IT. Therefor scientists talk about "pseudo random" in this context.
Why? The reason is that computers do exactly what they are told, not less, not more. So if you tell a computer to give you some random number, he will ask: Which one?
Random resp. "pseudo random" numbers are always produced the same way: start with a defined value ("seed"), pass it through some algorithm, and the result is your random value.
That means: If you know the seed AND the algorithm, you can calculate the random value on yourself.
Means as well: Using same seed and same algorithm always will produce the same random value.
Means third: To get multiple random values you'll have to use either multiple different seeds or multiple different algorithms.
(E.g. using the actual timestamp as a seed is a common method, but unfortunately Blender doesn't offer access to system time.)
Blender's random output generates one specific value ("seed") for each object, not more. Therefor you'll have to use a different algorithm to get another one.
The problem is: if you use operations like addition for your algorithms your second random will always be higher than the first. Resp. using multiplications will always produce lower values.
And so on.
Not very exciting indeed.
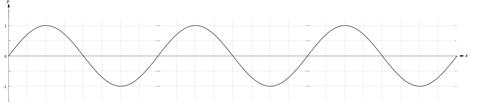
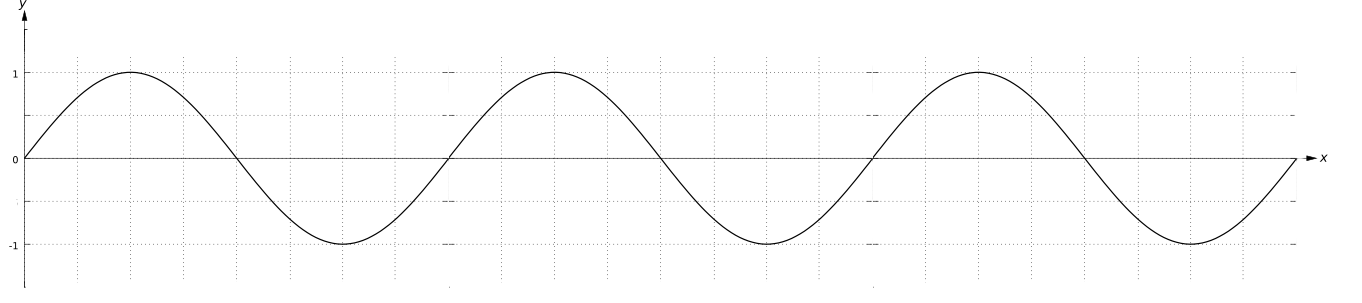
But I found a really smart solution for this problem here (look up candreacchio's answer): using a sinus curve as algorithm base.
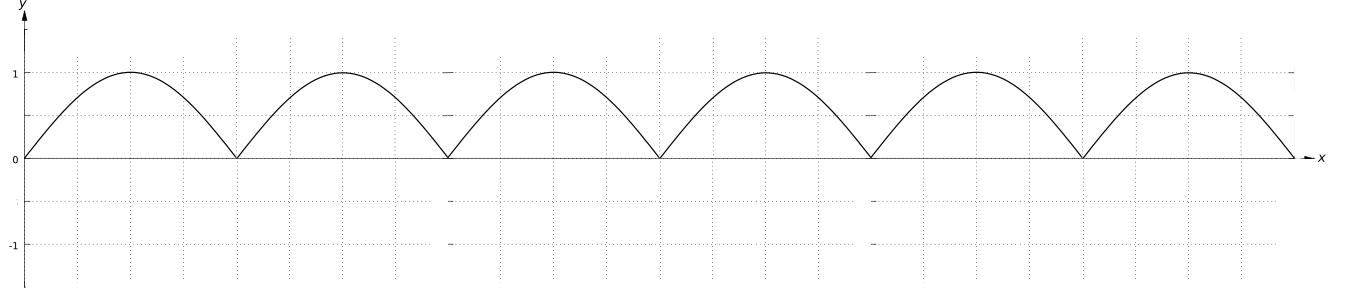
The sinus curve - as you surely know - oscillates between -1 and 1:
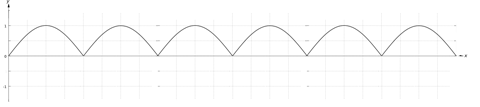
... whilst absolute (sinus) mirrors the lower parts in Y direction and therefor produces values between 0 and 1:
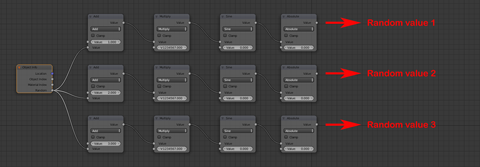
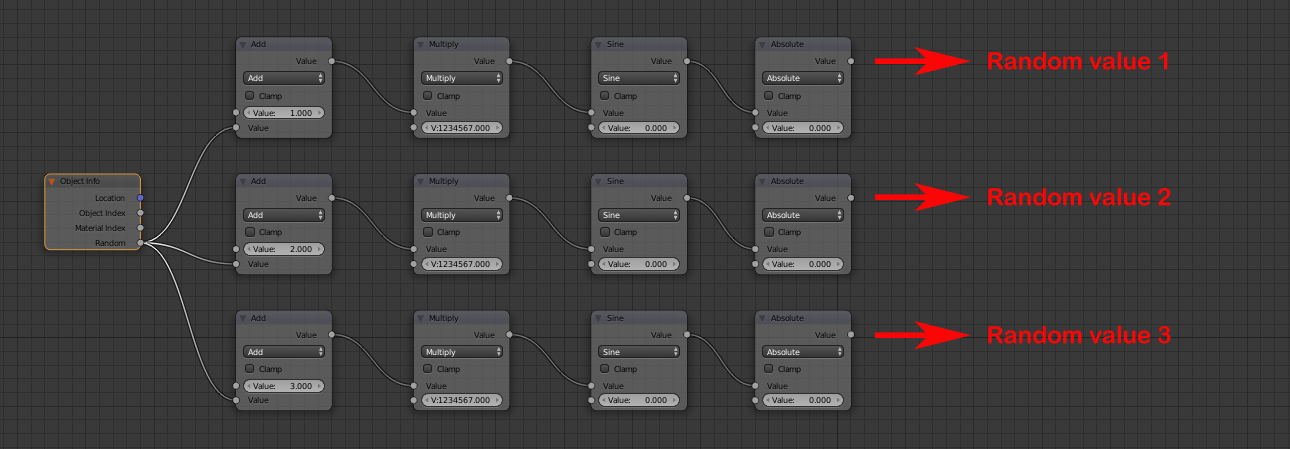
Now for the random values let's take Blender's seed and add some different numbers:
Seed1 = 1 + Blender seed
Seed2 = 2 + Blender seed
Seed3 = 3 + Blender seed
... a.s.o.
(You may use any number of your choice here.)
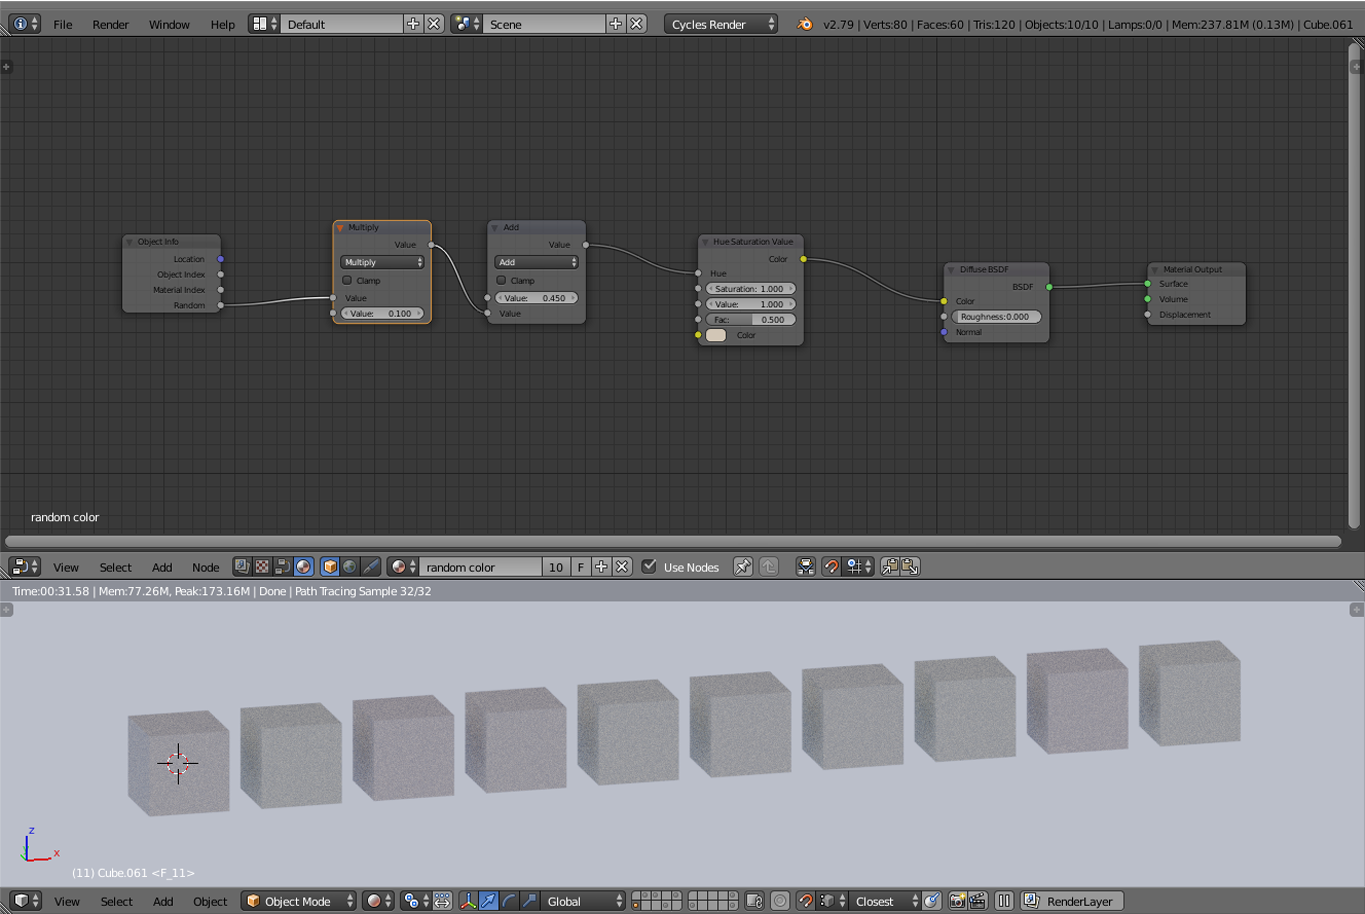
... then multiply with a quite high number (I used 1234567, but it's really not important).
The multiplication stretches the whole thing in X direction and therefor helps to hide any relationships between the different values:


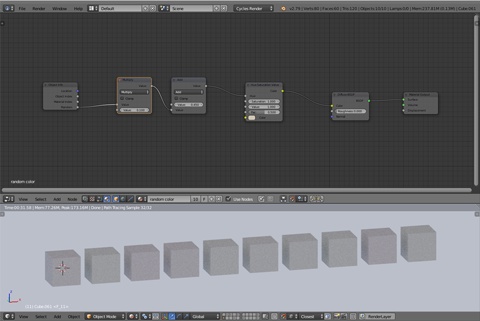
Here's the node setup:
Back to my brick material: I use one random value with the afore mentioned settings for shading variations from one cube to the other, and a second random value for variations within the cube. Therefor I use the same basic color but modify HSV "Value" to get some slightly darker stones:
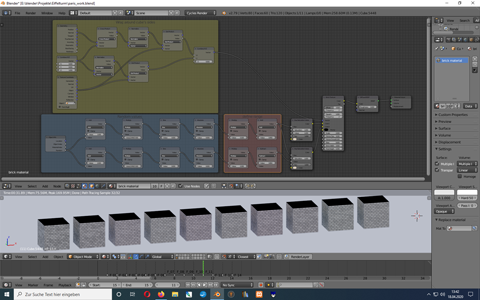

It might be a little oversized for some background houses, and the details are way too subtle to be clearly visible, but I couldn't resist. It's the kind of really smart solution I adore (thanks a lot, candreacchio).
If you're interested in the method wrapping the texture around the cubes' sides: it's discussed here.
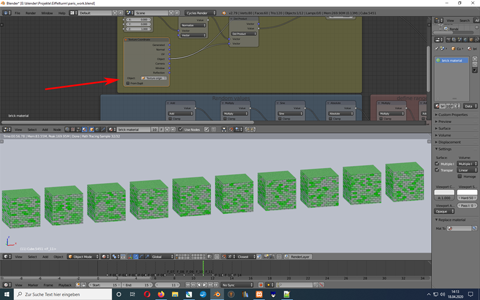
Let me just mention one last thing: Watching carefully you'll recognize that the pattern of shading variations within the cubes is the same for all cubes.
I might replace one color for clearer view:


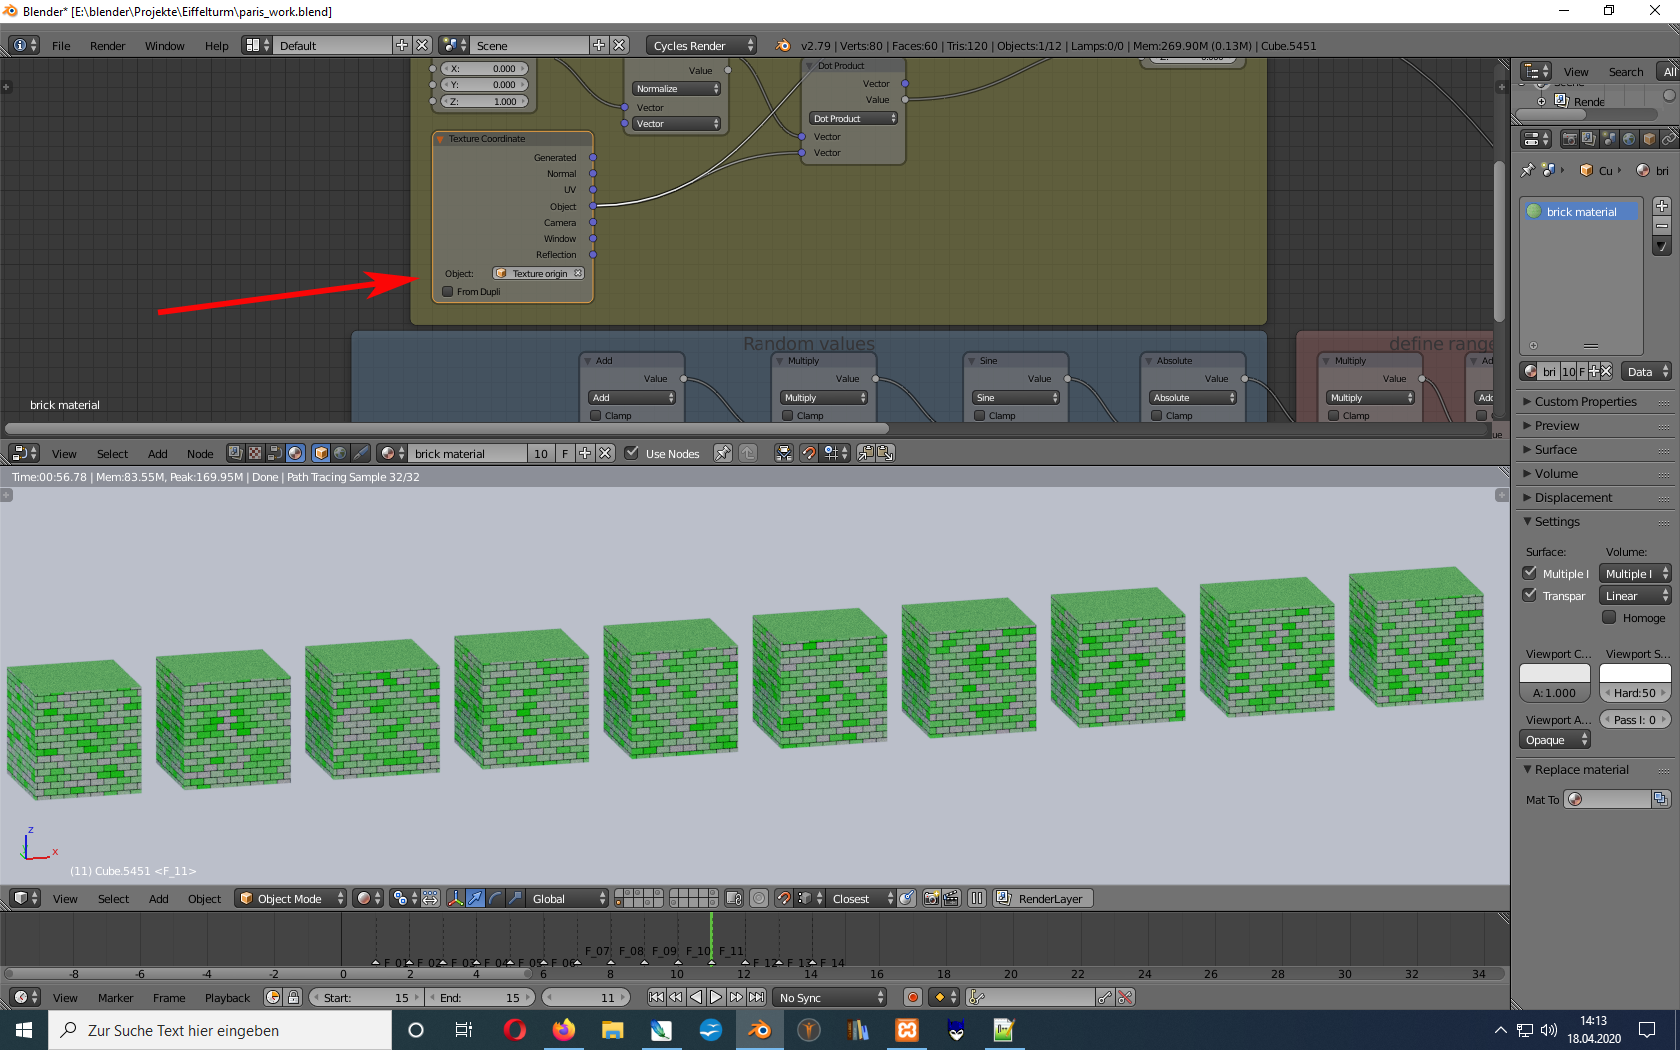
This is of course because we use "Object" as texture coordinate.
To avoid this we could use a fairly new feature (I guess it came along with Blender 2.79): using an extern object.
Place an empty somewhere in the scene, rename it to somehow "Texture origin" and use it in the Texture coordinate node:
I'm gonna add some gloss and bump to the material, but of course all of you know how to do so...
Let's go for the test renders next.